
Imagine a dessert that’s both tangy and sweet, perfect for warm weather and outdoor gatherings. Key Lime Pie Jars offer a refreshing twist on the classic key lime pie, making it easy to enjoy this beloved dessert in a convenient, individual serving.
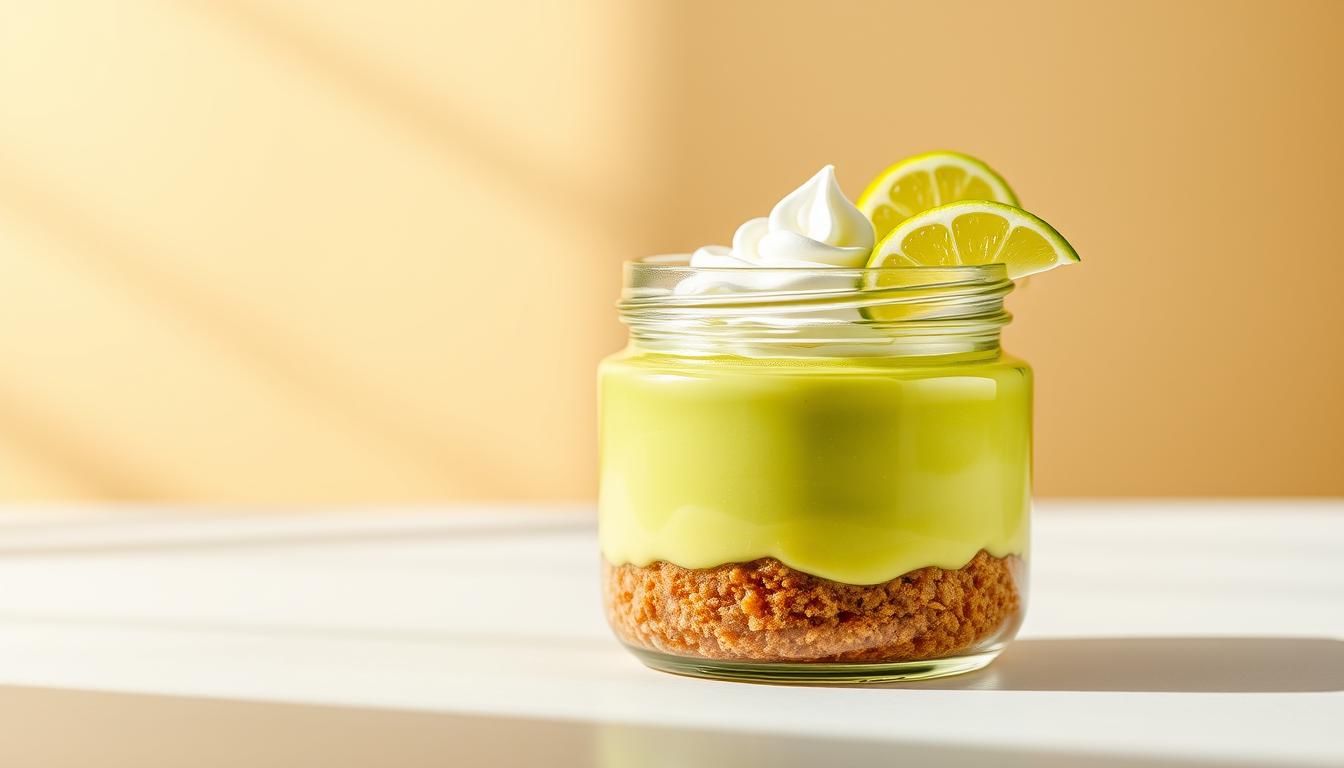
These adorable jars are not only a treat for the taste buds but also a feast for the eyes. With a graham cracker crust, a creamy key lime filling, and a topping of whipped cream, they’re sure to impress your guests. In this article, we’ll guide you through making your own homemade key lime pie in jars, including a simple recipe and tips for presentation.
Key Takeaways
- Easy-to-make individual dessert jars perfect for parties
- A twist on the classic key lime pie with a graham cracker crust
- Simple recipe with readily available ingredients
- Tips for presentation to impress your guests
- Perfect for warm weather and outdoor gatherings
The Charm of Key Lime Pie in Jar Form
There’s something irresistibly charming about key lime pie served in jars, making it a perfect dessert for any occasion. This unique presentation combines the classic tangy taste of key lime pie with the visual appeal of individual servings.
What Makes Key Lime Pie Special
Key lime pie is a beloved dessert known for its zesty and refreshing flavor. The combination of key lime juice, condensed milk, and a graham cracker crust creates a taste sensation that’s both tangy and sweet. This dessert is a staple in many cuisines, particularly in the Florida Keys, where key limes are abundant.
The Appeal of Individual Dessert Jars
Serving desserts in individual jars adds a touch of elegance and personalization to any gathering. The jar format allows for easy portion control and presents a visually appealing way to enjoy desserts. It’s perfect for parties, events, or even a simple family dinner, making the key lime pie experience even more enjoyable.
The History of Key Lime Pie
The history of Key Lime Pie is as rich as its flavor. This beloved dessert has its roots in the Florida Keys, where it was first created in the late 19th century.
Origins in the Florida Keys
The Florida Keys provided the perfect environment for the creation of Key Lime Pie. The abundance of key limes, along with the influence of various cultures, including Cuban and American, contributed to its development. The pie was initially made by local cooks who mixed key lime juice with sweetened condensed milk and eggs, baking it in a graham cracker crust.
Evolution to Modern Variations
Over time, Key Lime Pie has evolved, with various modern variations emerging. While traditional recipes remain popular, contemporary versions often incorporate new ingredients and techniques, such as using different types of citrus or adding unique flavorings. Despite these changes, the essence of Key Lime Pie remains unchanged, retaining its tangy, sweet flavor that has captivated dessert lovers for generations.
Essential Ingredients for Perfect Key Lime Pie Jars
Crafting the perfect Key Lime Pie Jars requires a thoughtful selection of ingredients. The quality and authenticity of these components directly impact the final product’s taste, texture, and overall appeal.
The Key Lime Debate: True Key Limes vs. Substitutes
The debate between using true Key Limes and substitutes is ongoing. True Key Limes, also known as Citrus aurantifolia, offer a unique flavor profile that is both tart and aromatic. However, they can be difficult to find in some regions and are often more expensive than their substitutes. Persian limes or regular limes are commonly used as substitutes, but they lack the same intensity and complexity as true Key Limes.
Graham Cracker Crust Components
The Graham cracker crust is a crucial element of Key Lime Pie Jars. The primary components include:
- Graham cracker crumbs
- Sugar
- Melted butter
| Ingredient | Quantity | Purpose |
|---|---|---|
| Graham cracker crumbs | 1 1/2 cups | Base of the crust |
| Sugar | 1/4 cup | Adds sweetness |
| Melted butter | 1/4 cup | Binds the crust |
Filling Ingredients
The filling is where the Key Lime Pie’s signature flavor resides. Essential ingredients include:
- Key Lime juice
- Condensed milk
- Egg yolks
By carefully selecting and combining these ingredients, you can create Key Lime Pie Jars that are both delicious and visually appealing. The balance between the tartness of the Key Lime juice and the sweetness of the condensed milk is crucial, as is the texture provided by the Graham cracker crust.
Kitchen Tools and Equipment Needed
To get started with your Key Lime Pie Jars, gather the necessary kitchen tools and equipment. Having the right tools on hand will make the preparation process smoother and more efficient.
Jar Selection and Preparation
Choosing the right jars for your Key Lime Pie is crucial. You’ll need small, clean glass jars with lids to store and serve your desserts. Mason jars or similar containers work well. Ensure the jars are sterilized before use to prevent any contamination. A simple way to sterilize them is by washing the jars in hot soapy water, then placing them in a preheated oven at 275°F (135°C) for about 10 minutes.
Essential Mixing and Baking Tools
For mixing and baking, you’ll need a few essential tools. A medium-sized bowl for mixing the crust ingredients, a large bowl for the filling, and a whisk or electric mixer to blend the ingredients smoothly. A measuring cups and spoons set is also necessary for accurate measurements. Additionally, a baking sheet will be useful for baking the crusts.
| Tool/Equipment | Purpose |
|---|---|
| Small glass jars with lids | Storage and serving |
| Medium-sized bowl | Mixing crust ingredients |
| Large bowl | Mixing filling ingredients |
| Whisk or electric mixer | Blending ingredients |
| Measuring cups and spoons | Accurate measurements |
| Baking sheet | Baking crusts |
Step-by-Step Instructions for Key Lime Pie Jars
With the right ingredients and a bit of patience, you can make perfect Key Lime Pie Jars at home. This guide will walk you through the process, from preparing your workspace to creating the delicious Key Lime filling.
Preparing Your Workspace and Ingredients
Before you start, make sure your workspace is clean and organized. Gather all the necessary ingredients, including key limes, graham crackers, and condensed milk. Having everything ready will make the process smoother and more enjoyable.
It’s also a good idea to read through the recipe once before you begin, to ensure you’re familiar with each step.
Making the Graham Cracker Crust
The graham cracker crust is a crucial component of Key Lime Pie Jars. To make it, you’ll need to crush the graham crackers and mix them with other ingredients.
Crushing and Mixing Techniques
Use a food processor to crush the graham crackers into fine crumbs. Then, mix these crumbs with melted butter and a bit of sugar until you get a uniform mixture.
Pressing and Setting the Crust
Press the graham cracker mixture into the bottom of your jars. Use a small spoon or your fingers to ensure the crust is evenly distributed. Chill the crust in the refrigerator to set.
Creating the Key Lime Filling
The Key Lime filling is where the magic happens. You’ll need to extract the maximum flavor from your limes and achieve the perfect consistency.
Extracting Maximum Flavor from Limes
Use a manual or electric juicer to get as much juice as possible from your Key Limes. The juice is the key to the filling’s flavor, so don’t be shy about squeezing those limes!
“The juice of the Key Lime is the soul of the pie.”
Achieving the Perfect Consistency
Mix the lime juice with condensed milk and egg yolks. The mixture should be smooth and creamy. If it’s too runny, you can adjust the consistency by adding more egg yolks or chilling it in the refrigerator.
By following these steps, you’ll be able to create delicious Key Lime Pie Jars that are sure to impress your friends and family.
Assembling Your Dessert Jars
Assembling Key Lime Pie Jars is an art that requires attention to detail and a touch of creativity. This final step brings together the various components you’ve prepared, transforming them into a visually appealing dessert.
Layering Techniques for Visual Appeal
The layering process is crucial for creating an attractive Key Lime Pie Jar. Start with a layer of graham cracker crust at the bottom of the jar, followed by a generous helping of the key lime filling. You can add a layer of whipped cream on top for extra visual appeal and flavor. Experiment with different layering patterns to create a unique look for your desserts.

| Layer | Component | Purpose |
|---|---|---|
| 1 | Graham Cracker Crust | Base and texture |
| 2 | Key Lime Filling | Main flavor component |
| 3 (optional) | Whipped Cream | Additional flavor and visual appeal |
Portion Control Tips
Portion control is essential when assembling your Key Lime Pie Jars. To achieve uniform portions, use a cookie scoop or a measuring cup to fill the jars. This ensures that each jar has a balanced amount of crust and filling, making them visually appealing and consistent in taste. Adjust the size of your portions based on the occasion and serving needs.
By mastering the assembly process, you’ll be able to create beautifully presented Key Lime Pie Jars that are sure to impress your guests.
Chilling and Setting Your Key Lime Pie Jars
Once you’ve assembled your Key Lime Pie Jars, it’s time to let the refrigerator work its magic. Chilling is a critical step that allows the flavors to meld together and the filling to set properly.
Optimal Refrigeration Times
The refrigeration time for Key Lime Pie Jars can vary depending on the size of the jars and the consistency of the filling. Generally, it’s recommended to chill them for at least 4 hours or overnight. This allows the filling to firm up and the flavors to mature, resulting in a better dessert setting.
For the best results, chill the jars at a consistent refrigerator temperature below 40°F (4°C). This helps in achieving the perfect texture and prevents bacterial growth.
How to Tell When They’re Ready
Determining when your Key Lime Pie Jars are ready involves checking the filling’s consistency and the overall appearance. The filling should be firm and slightly jiggly in the center. If you’re preparing these for key lime pie delivery, ensure they are chilled sufficiently to withstand transportation without compromising their texture.
A simple way to check is by gently jiggling one of the jars. If it appears set and the filling doesn’t ripple excessively, it’s ready to be served. Proper chilling ensures that your Key Lime Pie Jars are not only delicious but also visually appealing.
Troubleshooting Common Issues
While Key Lime Pie Jars are typically easy to make, there are some common pitfalls that can impact their quality. Addressing these issues promptly can ensure that your desserts turn out as expected.
Fixing a Runny Filling
A runny filling can be disappointing, but there are a few potential solutions. First, check that you’ve used the correct ratio of condensed milk to lime juice. If the problem persists, consider adding a stabilizer like cornstarch or egg yolks to enhance the filling’s texture. Refrigerating the jars for a longer period can also help the filling to set properly.
Preventing Soggy Crusts
Soggy crusts can ruin the texture of your Key Lime Pie Jars. To prevent this, ensure that your graham cracker crust is baked until it’s golden brown and crispy. Additionally, avoid overmixing the crust ingredients, as this can lead to a soggy texture. If you notice the crust becoming soggy during assembly, try chilling the crust for a few extra minutes before adding the filling.
Addressing Flavor Balance Problems
Achieving the perfect balance of tangy and sweet flavors is crucial for Key Lime Pie Jars. If your filling tastes too tart, consider adding a bit more condensed milk. Conversely, if it’s too sweet, add a squeeze of fresh lime juice. Tasting as you go can help you adjust the flavors accordingly. Here’s a list of tips to achieve the perfect flavor balance:
- Use fresh, high-quality ingredients.
- Adjust the amount of lime juice to your taste.
- Balance the sweetness with the right amount of condensed milk.
Creative Serving Suggestions
Once you’ve mastered the art of making Key Lime Pie Jars, it’s time to get creative with how you serve them. Presenting your desserts in an appealing way can elevate the overall dining experience and leave a lasting impression on your guests.

Garnishing Ideas
Garnishing your Key Lime Pie Jars can add a touch of elegance and whimsy. Consider topping them with whipped cream and a sprinkle of lime zest for a classic look. Alternatively, you could use edible flowers or microgreens to add a pop of color and freshness. For a more decadent treat, try garnishing with chocolate shavings or toasted coconut flakes.
Pairing Recommendations
Pairing your Key Lime Pie Jars with complementary foods or beverages can enhance their flavor profile. For a refreshing twist, serve them alongside a cold glass of iced tea or a citrus-infused cocktail. If you prefer to stick to desserts, consider pairing them with shortbread cookies or fresh fruit skewers for a delightful contrast in textures.
By incorporating these creative serving suggestions, you can transform your Key Lime Pie Jars into gourmet sweet treats that are sure to impress. Whether you’re hosting a dinner party or simply indulging in a sweet treat, these ideas will help you make the most of your desserts.
Delicious Variations on the Classic Recipe
From coconut to chocolate, and vegan to gluten-free, explore the diverse variations of Key Lime Pie that cater to different tastes and dietary needs. These creative twists on the classic recipe allow you to experiment with new flavors while maintaining the essence of this beloved dessert.
Coconut Key Lime Version
To create a Coconut Key Lime Pie, simply add toasted coconut flakes to the graham cracker crust and sprinkle some over the top as a garnish. You can also incorporate coconut cream into the filling for an enhanced tropical flavor. This variation is perfect for those who love the combination of lime and coconut.
Chocolate-Lime Combination
For a Chocolate-Lime Key Lime Pie, you can introduce cocoa powder or melted chocolate into the filling, creating a rich, chocolatey twist. The bitterness of the cocoa pairs surprisingly well with the tartness of the lime, making for a unique dessert experience. Consider topping it with chocolate shavings or whipped cream for added indulgence.
Vegan and Gluten-Free Adaptations
To make a vegan version of Key Lime Pie, replace the eggs with a flaxseed or chia seed mixture, and use a non-dairy milk. For a gluten-free adaptation, substitute the traditional graham cracker crust with a gluten-free alternative made from nuts or gluten-free crackers. These modifications ensure that everyone, regardless of dietary restrictions, can enjoy this delightful dessert.
By exploring these variations, you can keep your Key Lime Pie game fresh and exciting, whether you’re catering to different tastes or dietary requirements. Don’t be afraid to experiment and come up with your own unique variations!
Optional Additions to Enhance Your Dessert
Elevate your Key Lime Pie Jars with optional additions that can transform a simple dessert into a show-stopping treat. These additions not only enhance the flavor but also add a visually appealing element to your dessert.
Whipped Cream Variations
A dollop of whipped cream is a classic topping that pairs perfectly with the tangy flavor of Key Lime Pie. Consider flavoring your whipped cream with vanilla or a hint of lime zest for added depth.
Fruit and Nut Toppings
Adding fruit and nut toppings can introduce a delightful contrast in texture and flavor. Fresh berries, toasted coconut flakes, or chopped nuts are excellent choices that complement the citrusy notes of the Key Lime Pie.
Liqueur and Flavor Infusions
For adults, a splash of liqueur such as Grand Marnier or Cointreau can be infused into the filling or used as a topping, adding a sophisticated twist to your dessert. Alternatively, infusing the filling with flavors like espresso or citrus zest can also elevate the dessert.
Storage and Make-Ahead Tips
To ensure your Key Lime Pie Jars remain fresh and delicious, proper storage is crucial. Whether you’re making them a day ahead or preparing for a future event, understanding how to store them correctly is key.
Refrigeration Guidelines
For short-term storage, refrigeration is the best method. Keep your Key Lime Pie Jars in the refrigerator at a consistent temperature below 40°F (4°C). They should be covered tightly with plastic wrap or aluminum foil to prevent absorption of odors from other foods. Generally, they can be stored in the refrigerator for up to 3 days.
Freezing and Thawing Methods
For longer storage, freezing is an excellent option. Place the Key Lime Pie Jars in airtight containers or freezer-safe bags to prevent freezer burn. When you’re ready to serve, simply thaw them overnight in the refrigerator or at room temperature for a few hours. It’s essential to freeze them before adding any toppings to maintain the best texture and flavor. Frozen Key Lime Pie Jars can be stored for up to 2 months.
By following these storage and make-ahead tips, you can enjoy your Key Lime Pie Jars at their best, whether you’re serving them immediately or saving them for later.
Conclusion: Enjoying Your Homemade Key Lime Treats
Now that you’ve mastered the art of making Key Lime Pie Jars, it’s time to indulge in the fruits of your labor. Enjoying key lime pie jars is a delight, whether you’re savoring them on your own or sharing them with friends and family. These homemade desserts make perfect treats for any occasion, and their individual servings make them easy to enjoy on the go.
If you’re looking to spread the joy, consider key lime pie delivery to loved ones or using them as gourmet gifts. The presentation of these desserts is sure to impress, and the taste is sure to delight. You can also experiment with different variations, such as adding unique flavors or toppings, to make your Key Lime Pie Jars truly special.
Whatever way you choose to enjoy your Key Lime Pie Jars, be sure to savor the experience and appreciate the love and care that went into making them. With their perfect balance of tangy and sweet, these desserts are sure to become a favorite treat for years to come.
FAQ
What is a Key Lime Pie Jar?
A Key Lime Pie Jar is a miniature version of the classic Key Lime Pie dessert, served in individual jars. It’s a perfect treat for parties, gatherings, or as a gift.
Can I use regular limes instead of Key Limes?
While traditional Key Lime Pie recipes call for Key Limes, you can substitute them with regular limes or a combination of lime and lemon juice. However, the flavor profile may vary slightly.
How do I prevent my Key Lime Pie Jars from becoming too runny?
To prevent a runny filling, make sure to not overmix the filling ingredients, and refrigerate the jars for the recommended time to allow the filling to set properly.
Can I make Key Lime Pie Jars ahead of time?
Yes, you can prepare Key Lime Pie Jars in advance. They can be refrigerated for up to 3 days or frozen for longer storage. Simply thaw or serve chilled when needed.
What are some creative ways to serve Key Lime Pie Jars?
You can garnish Key Lime Pie Jars with whipped cream, toasted coconut flakes, or fresh lime zest. You can also pair them with complementary foods like shortbread cookies or citrus-infused tea.
Can I adapt the Key Lime Pie Jar recipe to be vegan or gluten-free?
Yes, you can modify the recipe to suit vegan or gluten-free diets. For example, you can use a gluten-free graham cracker crust and replace eggs with a vegan substitute.
How do I store leftover Key Lime Pie Jars?
Store leftover Key Lime Pie Jars in the refrigerator, covered with plastic wrap or aluminum foil, for up to 3 days. You can also freeze them for longer storage.
Can I customize the size of the Key Lime Pie Jars?
Yes, you can adjust the size of the jars according to your needs. Simply adjust the ingredient quantities and baking time accordingly.